In this post, you’ll find clear explanations for how to set up and use a sound wall in your classroom and how it helps students read and write. Then, grab the FREE sound wall lesson plans and gain access to my FREE Science of Sound Walls online training course!
For many K-2 teachers, the idea of using a sound wall in the classroom feels unfamiliar and maybe even intimidating. Many of us relied on word walls, leveled libraries, and the balanced literacy model to anchor our reading instruction. Moving away from what we’ve done in the past can be hard, but we know it is important.
A Sound Wall is a powerful instructional grounded in science. It helps students make meaningful connections between phonemes (sounds) and graphemes (letters or letter combinations).
If you’ve ever felt confused about how sound walls work or contemplated whether they’re worth the switch, then this post is for you.
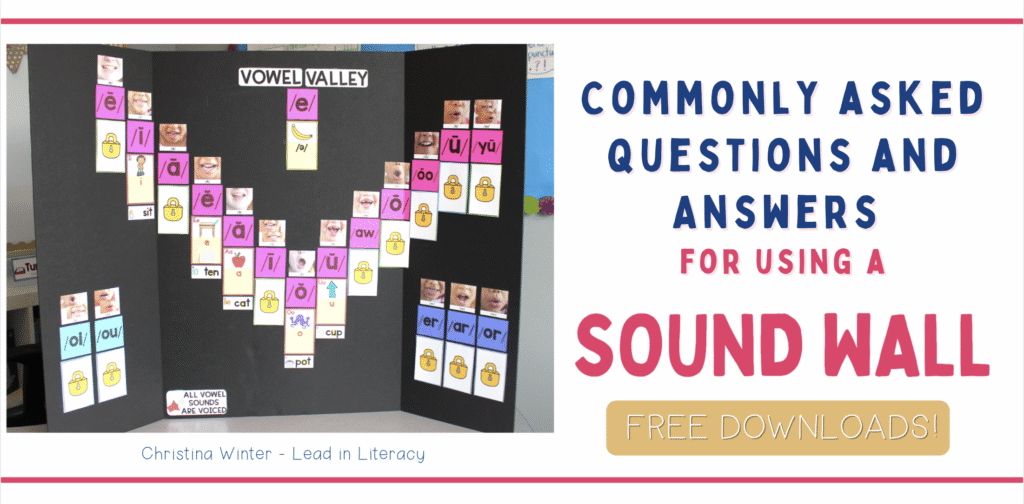
Today, I answer the most commonly asked questions I receive about using a sound wall in the classroom. I provide clear answers that help you better understand how sound walls work and why they are so beneficial to students. Then, I leave you with FREE sound wall lesson plans and information about my FREE Science of Sound Walls online training course!
What is a Sound Wall? How is a sound wall different from a Word Wall?
A sound wall is a way to organize and display the different sounds (phonemes) we hear in speech.
Sound walls help students develop phoneme-grapheme correspondence. When students say a sound out loud and then learn all the different ways it can be spelled, they’re engaging in orthographic mapping. This is the very process our brains use to store words permanently.
A sound wall is an effective tool for students to reference when they are spelling and reading words.

A word wall is organized by letters of the alphabet. Words are placed under the first letter- cat under C, dog under D, and so on.
When using a word wall, we ask students to find the letter first and then match the sound, but that’s not how language works. Language is speech to print. We hear speech sounds before we learn to match the sounds to a particular letter or letter patterns. Students don’t spell by thinking about how words look—they spell by thinking about how words sound.
Sound walls are more than a fad. They reflect how kids’ brains actually learn to read.
Why should I use a Sound Wall in my classroom?
Here are a few of the main benefits of using a sound wall in the classroom:
–Sound walls are based on the science of reading! Research tells us that readers make the connection between print patterns and phonological information that is already stored in the brain in order to then make meaning of the word they’re reading (Moats, 2010). This is why explicitly teaching phonemes is necessary before you teach sound-letter correspondence.
–Sound walls approach things from the learner’s point of view. On a traditional A-Z word wall, words are categorized by the first letter. But that doesn’t make sense to someone who is just learning to spell. A student looking for the word phone will not look to P. Putting the word knee under K is confusing to them!
A sound wall categorizes graphemes by their sounds which makes much more sense to the student who is just learning to spell.
–They allow for explicit instruction of phonemes. Kids learn to talk well before they learn to read or write. This is because the human brain is hardwired for speech, but not for reading and writing. Students need direct and explicit instruction on how to read, write, and spell. A sound wall is a tool that allows for this valuable, explicit phonics instruction.

How do I use a Sound Wall with my students?
Start slowly. You don’t need to unveil the entire wall at once. It’s best to build it gradually, one sound at a time. Here’s a three-step routine you can follow:
Introduce the phoneme. Start with a sound card and a keyword picture. Discuss what sound it makes and where students might hear it.
Teach the articulation. Show students how the sound is formed in the mouth. Use a mirror and an articulation photo. Let students explore: “What do your lips do? What do your teeth and tongue do?”
Connect to the grapheme. Introduce the most common letter or letter combination that represents the sound.
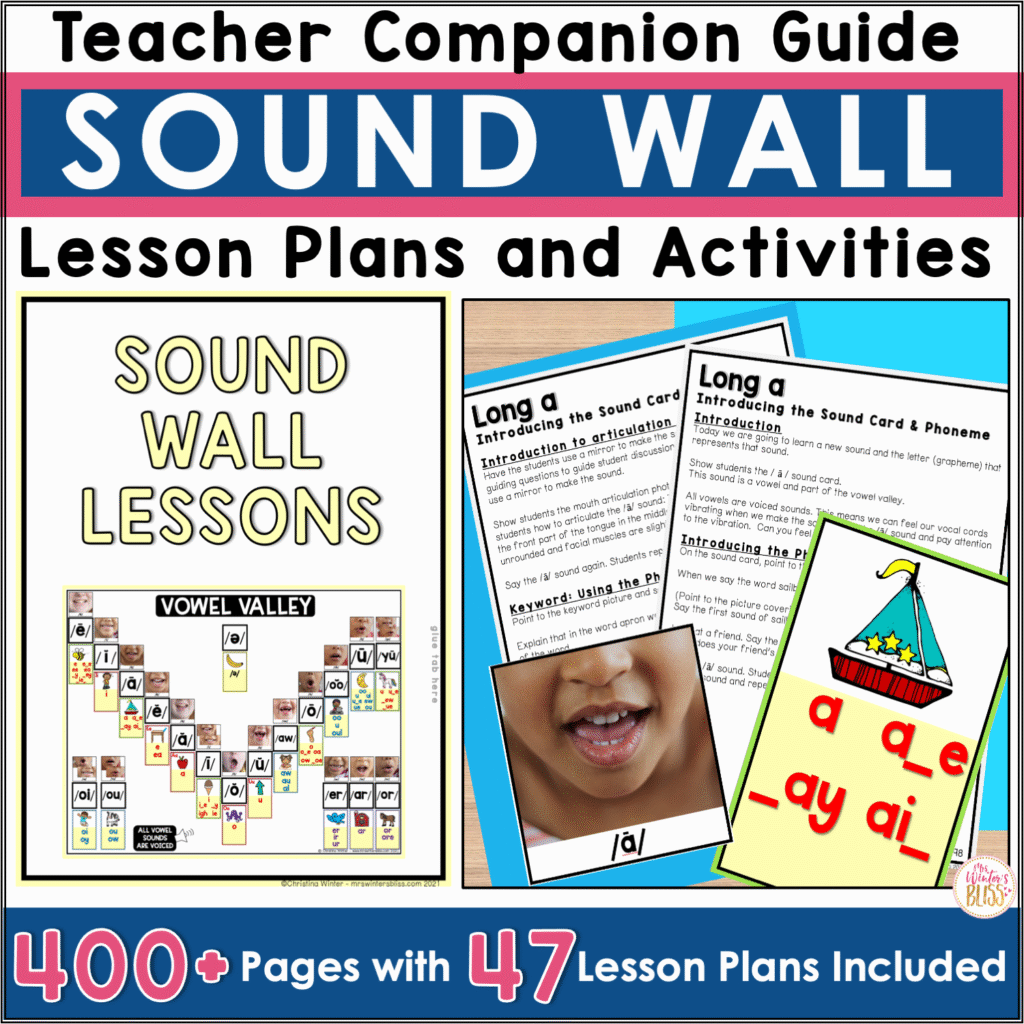
Looking for more support as you begin to use a sound wall? Then check out my Sound Wall Teacher’s Guide. This resource includes explicit Sound Wall Lesson Plans and was created as a companion to my science of reading-aligned Sound Wall, but it can be used with any sound wall or phonics scope & sequence. It is filled with information, lesson plans, and student activities you need to introduce and use a sound wall.
What should go on the Sound Wall?
There are two main parts to a sound wall:
Consonant wall

It is recommended that you arrange the consonant sound wall by the place and manner of articulation.
- Place of articulation refers to where in the mouth a sound occurs.
- Manner of articulation refers to what the lips, teeth, tongue, vocal cords, and air stream are doing to produce the sound
Post the headings along the top of the grid to describe the place of articulation or where in the mouth the sound is being produced. Vertically, post the manner of articulation, including what happens with airflow and vocal cords.
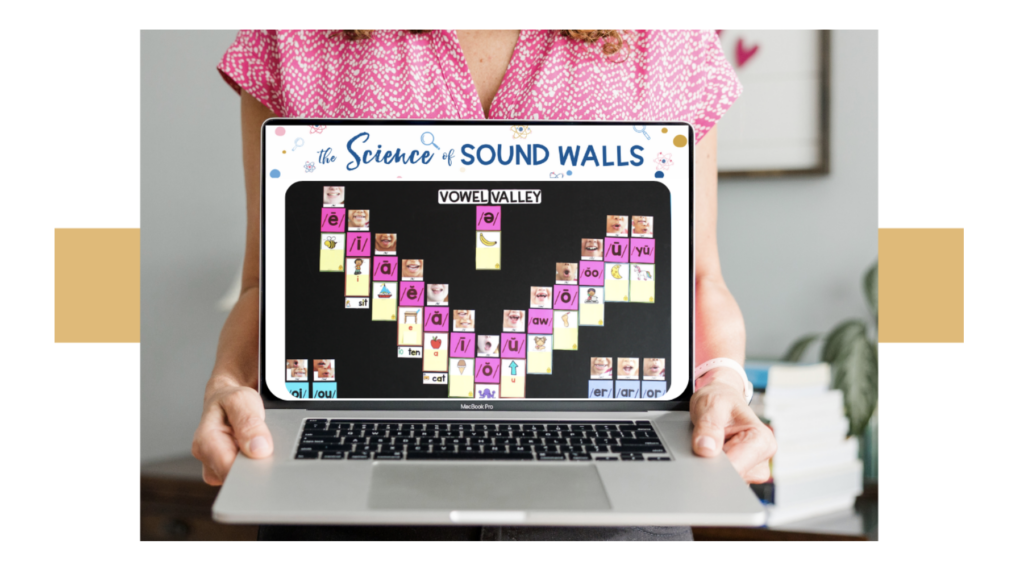
Vowel valley
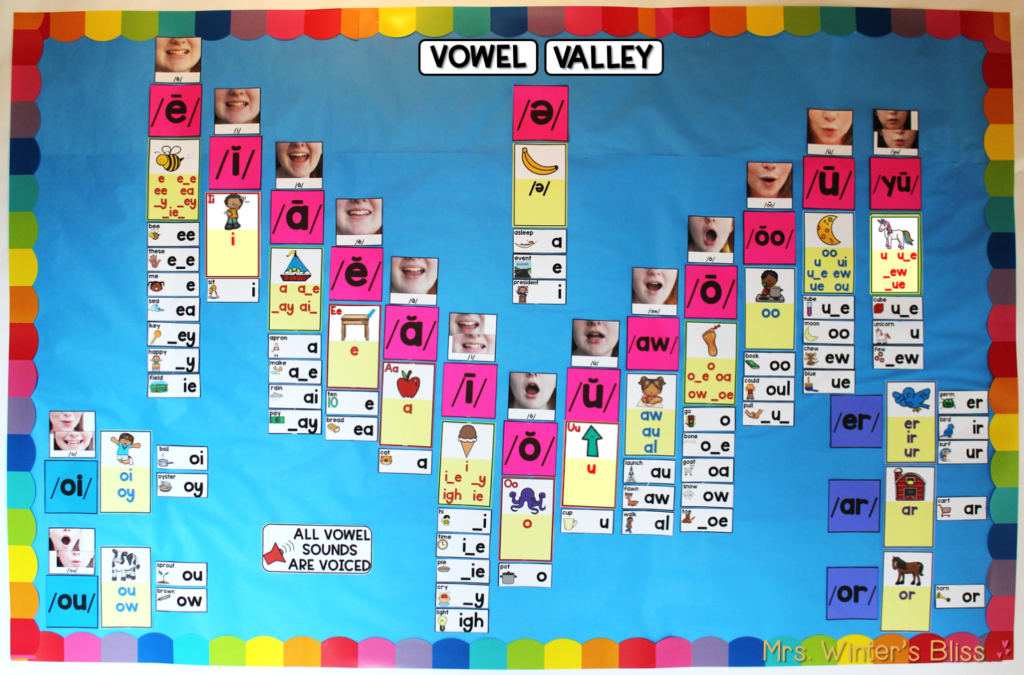
The Vowel Valley is organized by the place of articulation. Visually, it is represented in the shape of a V or a valley.
Does the vowel valley need to be in the V-shape?
Yes, it should be. The V shape is intentional, as it mimics the change in the position of our mouth and the shift in our jaw when we produce the different vowel sounds.
For example, when you make the first vowel sound, /e/ your jaw is high. Your lips are in a smile position. As you move down the vowel valley your jaw lowers to open and your tongue drops. When you reach the bottom of the valley, your mouth is open and your smile lessens.
As you move back up the vowel valley the shape of your mouth tightens and your mouth round. These are the back, rounded vowels. Your tongue retracts toward the back of your mouth and the sound comes from the back of your throat.
Both the Consonant Sound Wall and the Vowel Valley should include:
✅ Phoneme Group Labels
✅ Articulation photos showing how the sound is made with the mouth
✅ Sound / phoneme cards with a visual to represent the sound
✅ Sound Spelling/ Grapheme cards for spelling the sound
✅ Lock icons ? to indicate that a sound hasn’t been “unlocked” (taught)

Check out these posts for more information on how to set up a consonant sound wall and vowel valley.
I don’t have much wall space. Can I still use a Sound Wall?
Yes! You have options. Teachers have successfully implemented sound walls with:
- Tri-fold boards
If you have limited wall space or are worried that students won’t be able to see the sound walls from their seats? Create a mobile sound wall using a tri-fold project display board. Use it on the rug for whole-class instruction, bring it to your table for small-group work, or place it in a center to support students in their independent practice.

- Portable folders or binders for each student
You can also print individual sound wall folders for students to use at school or at home. The disadvantage of this option is that students may become overwhelmed as the sound walls display all the phonemes and graphemes from the beginning.

If you’re not interested in resizing the cards, printing, laminating, etc, then my VIRTUAL SOUND WALL and VOWEL VALLEY is right for you!
This sound wall has all the components you’ll need to easily and introduce each phoneme to your students, and there is NO PREP work required!
I created this virtual, interactive sound wall on Google Slides so you can display it on your SmartBoard, projector, or whatever digital platform you use. You can use it on laptops with small groups or individual students, and even share it with families to use at home!

A sound wall doesn’t have to be fancy; it just needs to be functional. The key is that students can see it, interact with it, and use it regularly. You just need to choose an option that works for you and your classroom.
Should I post high-frequency words on my Sound Wall?
I don’t think you should post high-frequency words on the sound wall. When you implement a sound wall you are not creating a word wall, but rather a tool that helps students connect speech to print.
Approximately 80% of high-frequency words are fully decodable and there’s another large percentage of words that are decodable except for 1 phoneme. Of the Dolch sight word list, only 20 total words are not fully decodable.
The word wall list, if needed, should be minimal. You could have an irregular word list for students to use at their desks or create a “heart word hub” bulletin board and post the words after they have been explicitly taught and practiced.
Free Sound Wall Resources
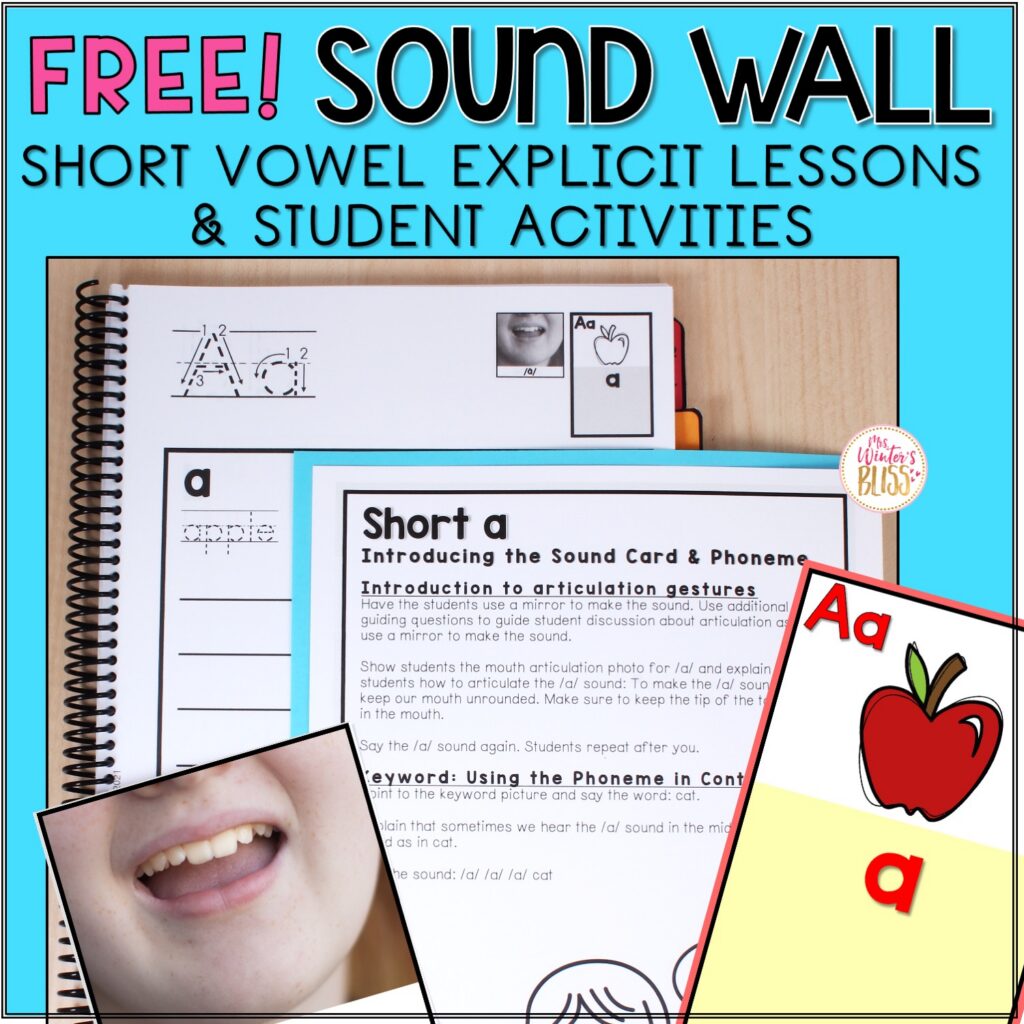
To get you started with some extra support, I’m happy to offer you FREE Sound Wall Explicit Lessons and Sound Wall Activities! This FREE sample includes explicit lesson plans and student dictionary pages to introduce the 5 short vowel phonemes and graphemes.
A FREE Sound Wall Training Course
Finally, if you are ready to learn more about using a sound wall in the classroom, check out my FREE Sound Wall course!
My FREE online course, The Science of Sound Walls, will take all the guesswork out of using your sound wall. This virtual course is your complete training and implementation plan for using a sound wall in your kindergarten, 1st, and 2nd-grade classrooms.
Learn more about The Science of Sound Walls here.